June 2025

A dimly lit living room featuring two maroon sofas, a wooden coffee table, and mold stains on the walls, with sunlight filtering in.
Uncategorized

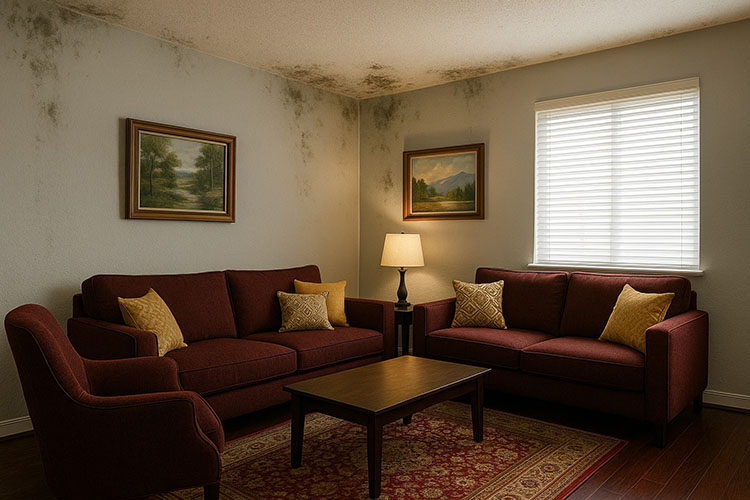
Why You Should Never Paint Over Mold Without Proper Cleaning

Painting over mold without first removing it can lead to wasted paint, a poor finish, and health risks. If you find mold, please contact a qualified mold-remediation company before painting. This article explains why mold must be cleaned first, how to work safely once it’s gone, and what to do for a long-lasting result. Why Painting Over Mold Doesn’t Work Mold is a living fungus that grows on damp surfaces such as walls, ceilings, or trim. When mold is present, paint cannot stick properly. Instead of creating a smooth, long-lasting finish, paint will bubble, peel, or crack as mold continues to grow underneath. Painting over mold also traps spores (tiny mold particles) behind the paint, and these spores can spread through your home’s air, potentially causing allergies or breathing problems. How to Prepare After Mold Removal Once a mold-remediation specialist has removed all visible mold and fixed the source of moisture, follow these steps before painting: These steps should help ensure a safe, durable finish and protect your home from recurring mold. What Happens If You Skip These Steps Why Proper Preparation Matters Taking these steps adds only a day or two to your project but offers lasting benefits: How to Prevent Mold from Returning Conclusion If you find mold, contact a qualified mold-remediation company before painting. After remediation, let the surface dry fully, clean it again, apply a mold-resistant primer, and then paint with quality paint. These steps should help ensure a safe, durable finish and protect your home from recurring mold.

Empty room with unfinished gray drywall, brown wooden floor, and a single window letting in natural light.
Painting Services

Why You Should Never Paint New Drywall Without Primer

Painting fresh drywall might seem simple—just roll on your favorite color and call it a day. However, skipping primer almost always leads to blotchy walls, wasted paint, and a finish that won’t last. This article covers why primer is so important for new drywall, how it works, and how to pick the right one. Why New Drywall Soaks Up Paint Drywall (sometimes called wallboard) consists of a soft, absorbent core wrapped in paper. When it’s first installed, the seams and screw holes are covered with joint compound (that white “mud” you see) and tape, then sanded smooth. Even after the compound dries, the underlying board still soaks up water and paint unevenly. If primer is skipped and finish paint is applied directly, lighter and darker patches will likely appear where the drywall absorbed different amounts of paint. Hiding those patches often requires two or three coats of paint instead of one—spending more time and money than necessary. A single coat of primer seals the surface so that paint goes on evenly. How Primer Prepares Your Walls Primer is a special coating that soaks into drywall and creates a uniform base. Here’s how it helps:

A colorful garland of alternating circles in pink, lavender, mint, and gold hangs against a distressed wooden background.
Painting Services

Why You Should Never Paint Over Peeling Paint Without Proper Preparation

Painting over peeling or flaking paint may seem like a quick solution, but it almost always leads to a poor result and more work later. When old paint is loose or peeling, new paint cannot stick properly. This article explains why you need to remove loose paint before repainting and how to get a smooth, long-lasting finish. Why Paint Peels and Flakes Paint can start to peel or flake because of moisture, age, or poor preparation before the first paint job. If water gets under the paint—from a leak or high humidity—it breaks the bond between the paint and the wall or siding. If the old paint was applied on a dusty or dirty surface, it may never have stuck well in the first place. Over time, exposure to sun and temperature changes also causes cracking and peeling. Why New Paint Won’t Stick to Loose Paint If you apply new paint over peeling areas, it will only stick to the loose layer below. That loose layer will keep breaking away, and the fresh paint will come off with it. Even small patches of peeling will spread over time. The result is an uneven, patchy finish that fails sooner than a properly prepared surface. How Proper Preparation Makes a Difference A smooth, long-lasting paint job starts with a solid base. Removing loose paint and preparing the surface ensures new paint can bond firmly. Proper preparation: Without this work, even the best paint cannot hide loose layers beneath it. Instead, it highlights the problems. Steps to Remove Loose Paint and Prepare the Surface What Happens If You Skip Preparation Choosing to paint directly over peeling paint leads to several problems: Benefits of Proper Preparation Taking time to remove old paint, sand, clean, fill, and prime adds a day or two to your project, but you get: Conclusion When you see peeling or flaking paint, resist the urge to cover it with a fresh coat. Properly scraping, sanding, cleaning, and priming the surface is essential for a lasting, high-quality paint job. By doing these steps, you create a secure base so your new paint can stick and stay looking good for years.

Scroll to Top