Painting Services

Extreme temperature
Painting Services

The Impact of Extreme Temperatures on Outdoor Painting

Painting the exterior of a home or building is a big investment, and ensuring a long-lasting finish requires more than just selecting the right paint. Temperature, both hot and cold, plays a crucial role in the quality of your outdoor paint job. Extreme temperatures can lead to premature paint failure or undesirable results if not managed properly. Let’s explore how both cold and hot weather conditions impact outdoor painting and what precautions can be taken to ensure success. Painting in Cold Weather Cold temperatures can significantly affect the drying process and overall quality of your paint job. Here’s how: 1. Slow Drying Times 2. Poor Adhesion 3. Cracking and Chalking Ideal Cold Weather Conditions Most paints are not recommended for use when temperatures drop below 50°F (10°C). However, some paints are specifically formulated for cold weather and can be applied at temperatures as low as 35°F (1.7°C). Always check the manufacturer’s recommendations for minimum application temperatures. Painting in Hot Weather Prep Properly: Ensure the surface is completely dry and free of frost or ice. Avoid painting in damp or windy conditions, which can further slow the drying process. For Hot Weather: Both cold and hot temperatures present challenges when painting outdoors, but careful planning and the right materials can help you avoid potential issues. When possible, aim to paint during mild weather conditions to achieve the best results. By understanding how extreme temperatures affect the painting process, you’ll be better equipped to manage your projects and achieve a beautiful, long-lasting finish. Just as cold weather can cause problems, high temperatures can also negatively impact outdoor painting. Extreme heat and direct sunlight create their own set of challenges. 1. Rapid Drying Times 2. Blistering and Bubbling 3. Reduced Adhesion Ideal Hot Weather Conditions The best temperatures for painting in hot weather are typically between 50°F and 85°F (10°C to 29°C). Avoid painting in direct sunlight or when the surface temperature exceeds 90°F (32°C). Morning or late afternoon painting can help avoid the extreme heat of midday, providing more consistent results. How to Mitigate Temperature Effects on Outdoor Painting While you can’t control the weather, there are steps you can take to ensure a quality paint job in extreme temperatures. For Cold Weather:

A cat sitting on dog's head
Painting Services

Painting with Pets

Painting your home can be a refreshing and transformative experience, but it takes on an added layer of complexity when you share your space with furry friends. Whether you’re updating your walls or adding a splash of color to your pet’s favorite corner, it’s important to consider their safety and comfort throughout the process. Here are some essential tips for painting with pets in mind: 1. Choose Pet-Friendly Paints First and foremost, opt for paints that are low in volatile organic compounds (VOCs). VOCs can emit harmful fumes that may affect both pets and humans. Look for paints labeled as low-VOC or zero-VOC to ensure a safer environment for your four-legged companions. 2. Prepare Your Space Before you start painting, create a pet-free zone. This involves moving your pets to a different room or area of the house. Set up a comfortable space with their favorite toys, bedding, and fresh water to keep them occupied and relaxed. If possible, consider using a pet sitter or asking a friend to look after them during the painting process. 3. Ventilation is Key Proper ventilation is crucial when painting. Open windows and use fans to ensure that any fumes are quickly dispersed. This not only helps in speeding up the drying process but also minimizes the risk of your pets inhaling any lingering chemicals. 4. Keep Paints and Supplies Out of Reach Make sure all paint cans, brushes, and other supplies are stored securely and out of your pet’s reach. Curious pets might accidentally knock over a can of paint or ingest something harmful, so it’s best to keep these items in a closed cabinet or on high shelves. 5. Protect Your Pets’ Belongings If you’re painting a room that your pet frequents, be sure to cover their bedding and toys to protect them from paint splatters. It’s also a good idea to wash any items that might come into contact with paint to avoid potential ingestion of harmful substances. 6. Post-Painting Precautions Once the painting is complete, ensure the room is thoroughly dry and well-ventilated before allowing your pets back in. Even low-VOC paints can take some time to fully off-gas, so it’s wise to wait at least 24-48 hours before reintroducing your pets to the freshly painted space. 7. Consider Pet-Safe Decor Options When decorating or adding color accents, choose materials that are easy to clean and won’t pose a hazard to your pets. For example, opt for washable paint finishes and durable fabrics for pet-friendly furniture. 8. Monitor for Reactions After your pets return to the newly painted area, keep an eye on them for any unusual behavior or signs of discomfort. If you notice anything concerning, consult with your veterinarian to address any potential issues. By taking these precautions, you can ensure that your painting project enhances your home without compromising your pets’ health and happiness. Happy painting!

A paintbrush and a paint on a wood surface
Painting Services

Why You Should Wait Before Painting New Deck Wood

A fresh deck made from new wood can be a beautiful addition to your home, but painting it too soon can lead to disappointing results. While you might be eager to apply paint or stain to protect and beautify the wood, it’s important to wait. New wood, especially pressure-treated lumber commonly used for decks, must properly cure and settle before it can hold paint or stain effectively. Here’s why waiting is essential and how to determine when your new deck is ready for painting. Why You Need to Wait 1. Moisture Content in New Wood New Wood is Moist: Freshly cut or pressure-treated wood is typically saturated with moisture. This is especially true for pressure-treated lumber, treated with chemical preservatives to protect it from rot, insects, and decay. These chemicals are injected into the wood using high pressure, leaving it soaked with moisture when first installed. Why It Matters: If you paint new wood before it has had a chance to dry out, the moisture trapped inside the wood will prevent the paint from properly adhering to the surface. The moisture will try to escape as the wood dries, potentially causing the paint to blister, peel, or crack. This leads to premature paint failure, meaning you’ll have to repaint sooner than expected. 2. Wood Needs Time to Season Natural Drying Process: Beyond just the moisture from treatment, even untreated wood contains natural moisture that needs time to evaporate. As the wood dries, it will shrink slightly, expand, and contract with temperature changes. Why It Matters: Painting or staining the wood too early can lead to adhesion issues and uneven coverage. Allowing the wood to season or “cure” ensures the surface is stable, dry, and ready to hold paint or stain. 3. Prevents Surface Contamination Debris and Oils: New wood, particularly when it has just been cut or milled, may still have a layer of mill glaze—a shiny surface coating caused by the heat of the milling process. This glaze and any residual oils or debris from manufacturing or handling can prevent paint from properly bonding to the wood. Why It Matters: Over time, exposure to the elements naturally removes this mill glaze and cleanses the surface. Painting too soon, before this process happens, can lead to uneven finishes and poor paint adherence. How Long Should You Wait? 1. Type of Wood Matters Pressure-Treated Wood: The general recommendation for pressure-treated wood, which is commonly used for decking, is to wait at least 3 to 6 months before painting or staining. This allows time for the wood to dry out thoroughly and lose its excess moisture. Kiln-Dried or Pre-Treated Wood: If the wood was kiln-dried or pre-treated for painting, you may be able to paint sooner. Kiln-dried wood has been treated to remove moisture and may only need a few weeks to acclimate to outdoor conditions before painting. Untreated Wood: Untreated lumber, such as cedar or redwood, may only require a few months to dry out. However, always perform moisture tests before painting to ensure it’s fully dry. 2. Seasonal Factors Weather and Humidity: Local weather conditions can affect the drying process. The drying period may be extended if you live in a humid or rainy climate. Similarly, wood exposed to direct sunlight and warm temperatures will dry faster than wood installed in a shaded or cooler area. Rain Exposure: Let the deck dry completely after any rain before considering painting. Ideally, wait several days of dry weather to ensure no moisture is trapped in the wood. How to Test If Your Deck is Ready for Painting Before painting or staining your deck, testing the wood to ensure it’s dry enough to accept paint is essential. Here are a few methods to check: Water Test: Spritz a small amount of water onto the deck’s surface. The wood is still too wet for painting if the water beads up on the surface. If it soaks into the wood within a few seconds, it’s likely dry enough to paint. Moisture Meter: A moisture meter is a more precise way to check the wood’s readiness. The ideal moisture content for wood before painting should be between 12% and 15%. Moisture levels above this range indicate that the wood needs more time to dry. What Happens If You Paint Too Soon? If you’re tempted to paint your new deck before it’s ready, here are some of the issues you might encounter: Blistering and Peeling: Moisture trapped inside the wood will try to escape, pushing the paint off the surface. This results in blistering and peeling, which can ruin the appearance of your deck and require extensive repainting or stripping. Poor Adhesion: Paint applied to wood that hasn’t thoroughly dried will not adhere properly, leading to a patchy or uneven finish. You may notice areas where the paint doesn’t seem to stick, creating an inconsistent appearance. Cracking: As new wood expands and contracts with moisture changes, paint that hasn’t fully bonded can crack, leading to premature wear and the need for touch-ups or complete repainting. Conclusion: Patience Pays Off Painting or staining your new wood deck is an important step in protecting it from the elements and enhancing its appearance, but waiting until the wood is fully ready is crucial. Rushing the process can lead to peeling, cracking, and overall poor performance of the paint or stain. By giving the wood time to dry, shrink, and stabilize, you ensure that the paint or stain will adhere properly, providing long-lasting protection and beauty to your deck. Always test the wood’s moisture content and follow manufacturer recommendations to achieve the best results. In the end, patience will save you time, money, and frustration while also giving you a beautiful, durable deck finish.

Front view of a beautiful house
Painting Services

Why Pressure Washing is Essential for Maintaining Your Home: Key Benefits Explained

Maintaining the exterior of your home is just as important as caring for the interior. Over time, dirt, grime, mold, and other debris can accumulate on surfaces like your driveway, siding, deck, and sidewalks. Pressure washing is one of the most effective ways to keep these surfaces clean and in top condition. Not only does pressure washing enhance curb appeal, but it also helps protect your home from long-term damage. In this article, we’ll explore the key benefits of pressure washing and why it should be a regular part of your home maintenance routine. 1. Boosts Curb Appeal One of the most immediate and noticeable benefits of pressure washing is improving your home’s appearance. Over time, outdoor surfaces accumulate dirt, algae, mildew, and stains that dull their look. Pressure washing effectively removes these contaminants, restoring your home’s original shine. 2. Prevents Damage Dirt, mold, mildew, and algae accumulating on surfaces over time can cause long-term damage if left untreated. Moisture and contaminants trapped in porous surfaces like wood, concrete, and brick can lead to rot, decay, or structural weakening. 3. Saves Money in the Long Run Home maintenance can sometimes feel overwhelming, but preventive measures like pressure washing save money in the long term by avoiding costly repairs. 4. Improves Health and Safety The accumulation of contaminants like mold, mildew, algae, and pollen can pose health risks to your family, especially if you or someone in your household suffers from allergies or respiratory issues. 5. Prepares Surfaces for Renovation Suppose you plan to repaint your home’s exterior, restain your deck, or refinish other outdoor surfaces. Pressure washing is an essential first step in the preparation process. 6. Environmentally Friendly Cleaning Option Pressure washing is an eco-friendly cleaning solution because it primarily uses water and eliminates the need for harsh chemicals in many cases. Modern pressure washers are also designed to use less water than traditional garden hoses, making the process more efficient. 7. Saves Time and Effort Pressure washing is an incredibly efficient cleaning method, capable of removing years of dirt and grime in just a short amount of time. Trying to scrub surfaces like siding, driveways, or decks manually would take hours if not days. Pressure washing is a simple, effective, and affordable way to keep your home’s exterior clean, prevent long-term damage, and maintain curb appeal. Whether you’re preparing for a renovation, looking to increase your home’s value, or want to keep your property in pristine condition, regular pressure washing should be an essential part of your home maintenance routine. Investing in pressure washing will protect your home from unnecessary wear and tear, save money on future repairs, and create a healthier environment for your family.

Interior and Exterior Paint
Painting Services

Can Interior and Exterior Paint Be Used Interchangeably?

When it comes to painting, one common question is whether interior and exterior paints can be used interchangeably. While both types of paint share some basic qualities—like pigment and binder—they are formulated to serve very different purposes. Using them outside their intended environments can lead to performance issues, aesthetic problems, or even surface damage. Let’s dive into the key differences between interior and exterior paints and whether they can be used interchangeably. Key Differences Between Interior and Exterior Paints 1. Formulation and Durability 2. Flexibility and Adhesion 3. Resistance to Environmental Factors Can You Use Exterior Paint Indoors? While it’s technically possible to use exterior paint inside your home, it’s not advisable. Here’s why: Can You Use Interior Paint Outdoors? On the flip side, using interior paint outdoors is not recommended for several reasons: Special Cases Where You Might Consider It In general, interior and exterior paints are not designed to be interchangeable. Still, there are some specific cases where limited use may be appropriate: While interior and exterior paints may seem similar, they are formulated for specific environments and should not be used interchangeably. Exterior paint is meant to endure weather conditions and temperature changes, while interior paint is optimized for a clean, smooth finish inside the home. Using the wrong type of paint can lead to poor results, health concerns, and costly repairs down the road. While interior and exterior paints may seem similar, they are formulated for specific environments and should not be used interchangeably. Exterior paint is meant to endure weather conditions and temperature changes, while interior paint is optimized for a clean, smooth finish inside the home. Using the wrong type of paint can lead to poor results, health concerns, and costly repairs down the road.

Cool Paint Colors
Painting Services

What are Cool Paint Colors?

Cool paint colors are hues that create a sense of calm, serenity, and relaxation. They typically have undertones of blue, green, or purple, and they can make a room feel more spacious and tranquil. Here are some examples of cool paint colors: Cool paint colors are often used in spaces where relaxation and a sense of peace are desired, such as bedrooms, bathrooms, and living rooms. However, they can also be used in other areas of the home to create a refreshing and inviting atmosphere.

Exploring the timeless appeal of neutral paint colors
Painting Services

Exploring the Timeless Appeal of Neutral Paint Colors

Neutral paint colors are versatile and timeless, making them a popular choice for interior design. They serve as a backdrop that can complement various decorating styles and color schemes. Neutral colors often have undertones of gray, beige, or white, and they create a calm and balanced atmosphere in a room. Here are some examples of neutral paint colors: 1. White: Pure white or off-white colors create a clean and fresh look, and they can make a space feel more open and airy. 2. Beige: Beige is a warm neutral color that ranges from light to dark shades, making it suitable for both traditional and modern interiors. 3. Gray: Gray is a versatile neutral with cool undertones. Light grays can create a soft and sophisticated atmosphere, while dark grays can add depth and drama to a room. 4. Taupe: Taupe is a warm, earthy neutral that falls between brown and gray. It works well in both contemporary and classic design schemes. 5. Greige: A blend of gray and beige, greige is a popular neutral choice for its ability to adapt to various styles and color palettes. 6. Cream: Creamy neutral colors have a touch of warmth and can create a cozy and inviting atmosphere. 7. Ivory: Ivory is a soft and elegant neutral that can add a sense of luxury to a space. 8. Mushroom: Mushroom is a muted gray-brown color that creates a warm and inviting ambiance, particularly in living rooms and bedrooms. 9. Sand: A light, sandy beige, sand-colored walls can make a room feel beachy and relaxed. 10. Off-White: Off-white shades like antique white or linen white have a hint of warmth and work well in both traditional and contemporary interiors. 11. Alabaster: Alabaster is a soft and creamy white with a warm undertone, creating a serene and inviting atmosphere. Oatmeal: This warm, light beige color resembles the natural hue of oatmeal and adds a sense of comfort to a room. 13. Pebble Gray: Pebble gray is a soft and soothing neutral with a touch of warmth that works well in bedrooms and bathrooms. Stone: Stone-colored walls, with a mix of gray and beige, can create a sense of balance and neutrality in various spaces. Light Brown: Light brown or tan colors add warmth and coziness to a room, especially when combined with other earthy tones. Neutral colors provide a blank canvas for adding pops of color through furniture, decor, and accessories. They also allow for easy changes in decor and design over time without requiring a complete repaint.

Diy vs professional painting
Painting Services

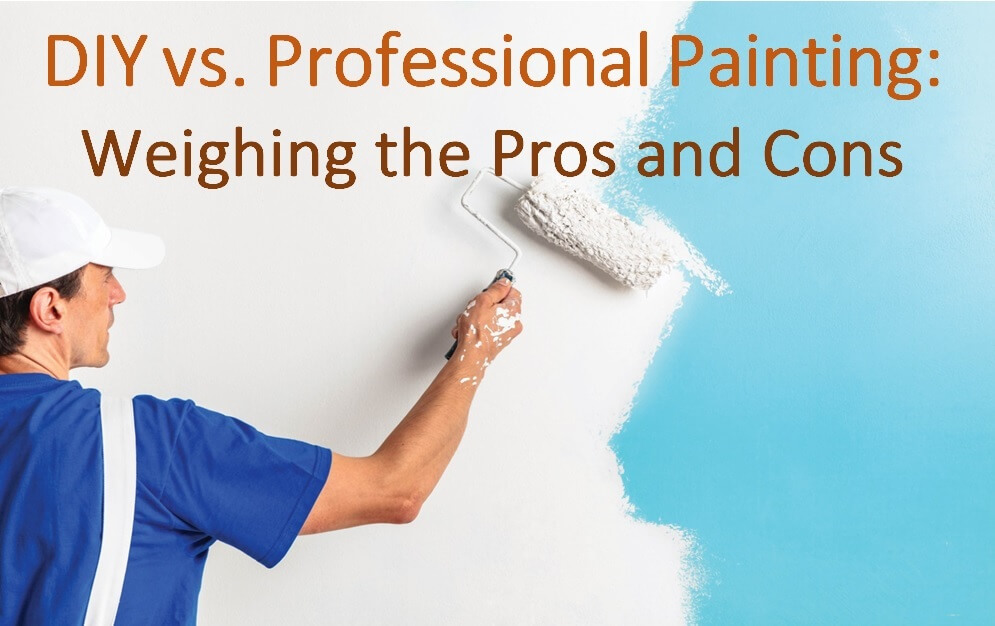
DIY vs. Professional Painting: Weighing the Pros and Cons

Painting can be a transformative and satisfying endeavor. Whether you’re looking to refresh your living room, update your home’s exterior, or add a personal touch to your space, choosing the right approach is crucial. When it comes to painting, you have two main options: the DIY route or hiring professional painters. In this article, we’ll explore the pros and cons of each choice to help you decide which path is right for your project. DIY Painting Pros: 1. Cost SavingsOne of the most significant advantages of DIY painting is cost savings. You won’t have to pay for professional labor, which can be a substantial part of the total project cost. 2. Sense of AccomplishmentCompleting a painting project on your own can be incredibly rewarding. It allows you to take pride in the transformation of your space and the work you’ve done. 3. FlexibilityYou have full control over the project, from choosing the paint color to scheduling the work. This flexibility can be appealing for those who want to work at their own pace. Cons: 1. Skill and ExpertisePainting might seem straightforward, but it requires skill and knowledge. Without proper techniques and experience, you may end up with uneven coats, streaks, or other imperfections. 2. Time-ConsumingDIY painting projects often take longer than expected. Proper surface preparation, multiple coats, and drying times can extend the project timeline. 3. Quality ControlAchieving a professional-level finish can be challenging. Small mistakes can be noticeable, and achieving a uniform, consistent look can be difficult. 4. Tools and MaterialsYou’ll need to invest in quality painting tools and materials, which can add to the overall cost. Cheap or subpar materials can result in an unsatisfactory outcome. Professional Painting Pros: 1. ExpertiseProfessional painters bring years of experience and expertise to the table. They understand paint types, surface preparation, and application techniques. 2. EfficiencyProfessionals work efficiently, ensuring that the project is completed within the estimated time frame. This is especially important for commercial projects with tight schedules. 3. Quality ResultsProfessional painters deliver high-quality, flawless results. They have the skills and tools to create a smooth, uniform finish that enhances the overall appearance of your space. 4. SafetyPainting can involve working at heights or with chemicals. Professionals are trained to follow safety protocols, reducing the risk of accidents. Cons: 1. CostHiring professionals comes with a price tag. Labor costs can be a significant portion of the project expenses, especially for larger or complex projects. 2. Loss of ControlWhile you have input, you may have to compromise on certain aspects of the project, such as the schedule or specific details. 3. Limited FlexibilityYou’ll need to coordinate with the painters’ schedule, which might not always align with your preferred timeline. Choosing the Right Approach: When deciding between DIY and professional painting, consider the scope of your project, your skill level, and your budget. Smaller, straightforward projects like painting a single room may be suitable for a DIY approach, especially if you have some experience and the patience to do it right. However, for larger or more complex projects, or if you desire a professional-level finish, hiring experts is often the wisest choice. Ultimately, the decision should align with your goals, timeline, and the level of quality you expect. Whether you embark on a DIY painting adventure or enlist professional painters, remember that a well-executed paint job can transform your space and leave you with a sense of satisfaction and pride in your home’s new look.

The importance of professional painting services
Painting Services

The Importance of Professional Painting Services: Transforming Spaces with Expertise

The world of painting is often associated with creativity, color, and aesthetics, but there’s much more to it than meets the eye. Whether you’re considering a fresh coat of paint for your home or looking to enhance the appeal of your commercial space, the importance of professional painting services cannot be overstated. In this article, we explore why hiring professionals for your painting needs is not just about a pretty finish but also about expertise, efficiency, and long-term benefits. 1. Expertise and Experience Professional painters bring a wealth of expertise and experience to every project. They have a deep understanding of paint types, surface preparation, and application techniques. This knowledge ensures that the right materials are used, and the paint adheres properly, resulting in a durable and long-lasting finish. 2. Quality Craftsmanship Quality matters, especially when it comes to painting. Professional painters take pride in their craft and are committed to delivering impeccable results. Their attention to detail, precision, and craftsmanship guarantees a flawless finish that can significantly enhance the appearance of your space. 3. Time Efficiency Time is a valuable resource, and professional painters understand the importance of efficiency. They work systematically, ensuring that the project is completed on schedule. This is particularly crucial for businesses that cannot afford extended downtime due to painting projects. 4. Surface Preparation Proper surface preparation is a key factor in the longevity of a paint job. Professionals know how to assess the condition of surfaces, identify issues like cracks or mold, and address them before painting. This thorough preparation ensures smooth and even application of paint. 5. Access to Quality Materials Professional painters have access to high-quality paints, primers, and tools that may not be readily available to the average homeowner or business owner. These superior materials contribute to the durability and overall finish of the paint job. 6. Safety Painting can involve working at heights, handling chemicals, and using equipment that requires safety precautions. Professional painters are trained to follow safety protocols, reducing the risk of accidents or injuries during the project. 7. Color Consultation Choosing the right paint colors can be a daunting task. Professional painters often provide color consultation services, helping clients select colors that suit their preferences, space, and lighting conditions. 8. Cost-Effective Solutions While professional painting services come with a cost, they can actually save you money in the long run. Professionals ensure that paint is applied efficiently and evenly, reducing the need for costly touch-ups or repaints in the near future. 9. Guaranteed Results Many professional painting services offer warranties or guarantees for their work. This means that if any issues arise after the project is completed, they will return to address them at no extra cost. Such assurances provide peace of mind and demonstrate the confidence professionals have in their work. 10. Enhancing Property Value A professionally painted home or commercial space not only looks better but can also increase its market value. Potential buyers or tenants are more likely to be attracted to well-maintained, aesthetically pleasing properties.

Shutters
Painting Services

Tips When Painting Shutters

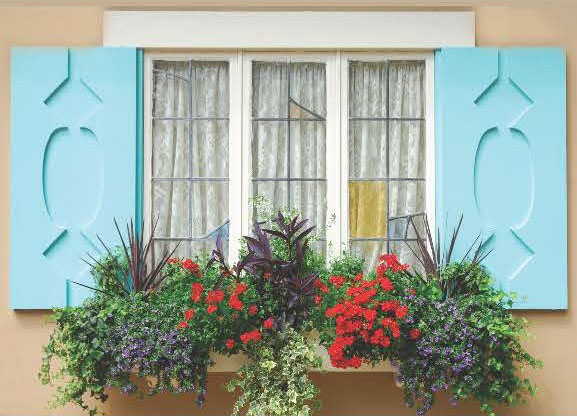
Repainting shutters affords homeowners a chance to try a bold new color or simply replace fading colors, and each option can make a home more appealing. Homeowners who have never before painted shutters can consider these tips as they prepare to begin the project. Don’t go it alone The most important step homeowners can take before beginning a shutter painting project is to enlist the help of a friend or family member. Someone to hold the ladder can make the project safer. Enlisting a third individual, working on the ground, who can take the shutters from the person on the ladder may be a wise move as well. Remove the shutters When painting shutters, homeowners want to remove them from the house. It might seem easier to leave the the shutters on and then paint them carefully with a brush, but that’s both time-consuming and a potential safety risk. Some shutters are installed with fasteners that look like screws, but that appearance is misleading, and shutters installed in this way cannot be removed with a drill or screwdriver. Homeowners should determine which material their shutters are made from, and then look for a corresponding removal tutorial on YouTube. Homeowners who can’t find one can contact the manufacturer or a contractor to determine the best way to remove the shutters. Clean the shutters prior to painting them It’s likely been years since the shutters were last painted, and over that time they’ve no doubt accumulated a lot of dirt and mildew. Homeowners can try a garden hose to clean them, and if that doesn’t work a power washer may be needed. If using a power washer with wooden shutters, be especially careful, as the force of the power washer may damage the wood. Vinyl shutters, like vinyl siding, can typically handle a strong power washing without being damaged. Wooden shutters also will need to have old paint removed before they can be repainted. Paint can be removed from wooden shutters with a sander or by applying a chemical paint stripper. Prime wooden shutters before painting. Though vinyl shutters won’t need to be primed unless the old paint is peeling, wooden shutters must be primed before they’re painted. Priming can be a tedious process, so homeowners should leave themselves ample time for this part of the project. Professionals typically apply two coats of paint. The first coat should be allowed to fully dry before the second coat is applied. Re-hang the shutters after they have fully dried. Only after the shutters have fully dried should they be placed back on the house. Employ the same buddy system when re-hanging the shutters, having one person hold the ladder and another pass each one up one at a time. Painting shutters can give a home a fresh look Painting shutters can give a home a fresh look, enhance curb appeal, and add a touch of personal style. With the proper preparation and a few handy tips, homeowners can achieve a professional finish lasting years.

Scroll to Top